Zooty Owl's Crafty Blog

Colourful Crochet, Craft, Cooking, and Contemplations

Showing posts with label granny stripes. Show all posts

Thursday 22 May 2014

Border and Edging: Baby Groovyghan CAL (9)

We have reached the end of our Baby Groovyghan Crochet Along!    I hope you have had as much fun making this as I have!

For those joining in now (or for those who are a little behind) here are the links to the previous posts:

WEEK 1 - RAINBOWS AND DAISIES SQUARES

WEEK 2 - RAINBOW HALF GRANNY SQUARES

WEEK 3 - THE FIRST STRIPES

WEEK 4 - CIRCLES IN SQUARES

WEEK 5 - ZOOTY OWL SQUARE

WEEK 6 - ITS STARTING TO LOOK A LOT LIKE A BABY GROOVYGHAN

WEEK 7 - POPCORN FLOWER SQUARES 

WEEK 8 - TRADITIONAL GRANNY SQUARES 

This is what my Baby Groovyghan looked like at the end of Week 8:


crochet baby blanket

Pattern Terms:  US 
Yarn:  Mirage 4ply 
Hook Size:  3.50mm
Final Measurement:  106cm x 86cm

Yarn Quantities:   White (200g);   Green (100g);  Pink (75g);  Purple (75g);  Orange (75g);   Yellow (50g)

My patterns are all written in US terms.  For those readers who are used to UK terms I will be including this little conversion chart in all my patterns for ease of reference.


BORDER 

Row 1

Bottom end: Join your yarn (I used white) into the 1st dc after the corner 3ch on the bottom end of the blanket

3ch in same place as join (counts as 1dc), 1dc into the top of each dc, when you reach a corner on a block 1dc into corner, 1dc into loop of  join, 1dc into corner on next block.   Repeat this to the end of the row of blocks;  2dc, 3ch, 2dc into corner 3ch;

Around the first side: 1dc into the top of each dc on the side of the block;   2dc into the corner   

*1dc into first dc of your first row of stripes;   2dc into the first dc on your next row of stripes;   continue across the stripes alternating 1dc then 2dc into each of the following stripes;

2dc into corner of next block;   1dc into the top of each dc;   2dc into the corner*

Repeat *to* across blocks and stripes until the last dc on the top corner block,  2dc, 3ch, 2dc into corner 3ch;

Top end:  1dc into the top of each dc, when you reach a corner on a block 1dc into corner, 1dc into loop of  join, 1dc into corner on next block.   Repeat this to the end of the row of blocks;  2dc, 3ch, 2dc into corner 3ch

Around the second side: As for the first side.  Sl st into the top of 3ch at start of bottom end.


crochet baby blanket

Row 2:  3ch into same space as sl st on Row 1 (counts as 1dc);  1dc into top of each dc;   into 3ch sp at corner 2dc, 3ch, 2dc.   Repeat around all four sides.   Sl st into top of 3ch at start to close.   Break off yarn


crochet baby blanket

Row 3:  Join yarn in any corner 3ch sp;   6ch (counts as 1dc, 3ch), 3dc in same space as join;   (skip two spaces, into third space from hook 3dc;  rep to last 3dc before 3ch corner space;   3dc, 3ch, 3dc into 3ch space) x 3;   skip two spaces, into third space from hook 3dc;   rep to last 3dc before 3ch corner space;   2dc into 3ch sp;   sl st into 3rd of 6ch to close.   Break off yarn.

Row 4:   Join yarn in any space between 3dc groupings;   1ch, 1sc into same space as join;  (3ch, 1sc into next space between 3dc groupings) repeat until 3ch cnr space is reached;  3ch, 1sc, 3ch, 1sc into corner space.    Repeat along all four sides and corners.   Sl st into 1ch at start to close.   Break off yarn.

Row 5:  Join yarn in any 3ch sp (not a corner);   3ch (counts as 1dc), 2dc into same space as join;   3dc into each 3ch space;   into corner 3ch space do 3dc, 3ch, 3dc;   sl st into top of 3ch at start to close.   Break off yarn.

Row 6:  Repeat Row 4 


crochet baby blanket

EDGING

Row 7:   Join yarn in any 3ch space;   3ch (counts as 1dc), 1dc in same space as join, 3ch;   (2dc into next 3ch sp, 3ch) repeat along all sides;   into each corner 3ch space crochet 2dc, 3ch, 2dc, 3ch;   all around sl st into top of 3ch space at start to close.   Break off yarn.

crochet baby blanket

Row 8:  Join yarn with a standing sc between any two dc on any side;  (standing sc = make a slip knot, insert the hook into the 3ch space, yarn over hook, pull loop to front of work;  yarn over hook again, pull through both loops on your hook)

(5ch,   remove loop from hook,   insert hook from front to back of work through the 3ch sp,   put loop back on hook and pull through to front of work through the 3ch sp, insert hook front to back through the sp between next two dc and crochet 1sc) repeat all around until last 3ch sp -  follow the steps above but instead of forming the sc between the 2dc you will make a sl st into the top of the start sc

This was quite difficult to explain and so I made a little video - in slow motion - to show you how!     (First attempt at a crochet video EVER!     Quality is not brilliant - still a steep learning curve here)


I have finally managed to work in all the ends (seems like there were a million!!) and my blanket is ready for its grand debut!!!


This blanket has been dragged around everywhere for my little photoshoots! 

crochet baby blanket

It is now seriously grubby and has been tugged out of shape a bit.   A gentle wash and tumble dry with those delightfully scented non-static sheets will sort that out nicely!

crochet baby blanket

 I love the GROOVY edging!!

The outside photoshoots etc have rendered this blanket unfit for use as a baby blanket - so  it will become a display piece in my workshop.


crochet baby blanket

Just look at all those lovely bright colours!

PS:    Pattern was written, made and tested by me alone!   If you find any bloopers please point them out and I will fix them asap!

Monday 12 May 2014

Mood Blanket 2014 - Change of Pace

I last posted progress on my Mood Blanket in mid March (HERE).

I was getting a bit bored with taking photos of the same old squares over and over (and over) and wanted to change the design a bit to indicate the change of season and also to make the project more interesting!

Stripes seemed like a good idea, but a stripe a day would result in a very long blanket!    Two rows a week (in the overall mood for that week) keeps the blanket more or less in line with the size I had planned from the start.

At the end of March there were five blocks short on my last row, and so the first five days of April had to be squares!

My mood rows so far:


crochet mood blanket

Pink = Sociable (6 - 12 April)
Green = Inspired (13 - 19 April)
Yellow = Happy (20 - 26 April)
Orange = Energetic (27 April - 3 May)
Purple = Grateful (4 May - 10 May)

Monday 5 May 2014

Traditional Granny Squares: Baby Groovyghan CAL(8)

I am still suffering from extreme Manda-litis.     This seems to be having a serious impact on my other crocheting - that is why this post is a little late - I am still playing catch up with my own Baby Groovyghan!

For those joining in now (or for those who are a little behind) here are the links to the previous posts:

WEEK 1 - RAINBOWS AND DAISIES SQUARES

WEEK 2 - RAINBOW HALF GRANNY SQUARES

WEEK 3 - THE FIRST STRIPES

WEEK 4 - CIRCLES IN SQUARES

WEEK 5 - ZOOTY OWL SQUARE

WEEK 6 - ITS STARTING TO LOOK A LOT LIKE A BABY GROOVYGHAN

WEEK 7 - POPCORN FLOWER SQUARES 

This is what my Baby Groovyghan looked like at the end of Week 7:

crochet baby blanket 

I chose the Mirage 4ply, which comes in these cutesy little 25g balls, because it the only locally available brand with a selection of wonderful bright (almost neon) colours!   A number of people have asked me where they can acquire yarn in the colours used in this project.   Mirage 4py does, however, only seem to be available here in South Africa,  but I have noticed that our South African 4ply is more or less equivalent to the Stylecraft Special DK HERE.

There are 59 shades to choose from in the Stylecraft Special DK range, among which you will find a lovely bright orange, yellow, a green, a pink and a purple!   Deramores delivers worldwide and their service is brilliant!

Our final row will be a row of Traditional Granny Squares since no Groovyghan would be quite complete without at least 1 row of grannies!

Pattern Terms:  US 
Yarn:  Mirage 4ply 
Hook Size:  350mm

My patterns are all written in US terms.  For those readers who are used to UK terms I will be including this little conversion chart in all my patterns for ease of reference.


Crochet 5 Stripes onto the bottom of the row of Popcorn Flower Squares as follows:

Row 1:   Join your white yarn (or whatever colour you are using as your border colour) into the corner 3ch of the first square in the row;    3ch in same place as join (counts as 1dc);  1dc into the top of each dc, when you reach a corner on a block 1dc into corner, 1dc into loop of  join, 1dc into corner on next block.   Repeat this to the end of the row of blocks.  1dc into the last corner 3ch. 

Rows 2 - 5:   "Granny Stripe"

Row 2:  Into space between first 2 double crochet on the wrong side of your work, crochet 3ch, 2dc,  *skip two spaces, into third space from hook 3dc* rep *to* to last 4dc, 3dc into space between last 2dc. 

Row 3:  turn work - now working on the right side;  ch 4;  *3dc into space between clusters* rep *to* to last sp between clusters, ch 1, 1dc into sp between last dc on final cluster of Row 2

Row 4:   Working on the wrong side of your work;  3ch, 2dc into 1ch sp at end of prev row (i.e the start of this row);  *3dc into space between each cluster* rep *to* to last sp between clusters

Row 5:  Repeat Row 3

Crochet 5 Stripes onto the Top of the row of Popcorn Flower Squares as follows:

Row 1:   Join your white yarn (or whatever colour you are using as your border colour) into the corner 3ch of the first square in the row; 
3ch in same place as join (counts as 1dc);  1dc into the top of each hdc, when you reach a corner on a block 1dc into corner, 1dc into loop of  join, 1dc into corner on next block.   Repeat this to the end of the row of blocks.  1dc into the last corner 3ch.

Row 2 - 5:   In the colour of your choice join yarn into first dc of previous row;  3ch (counts as first dc), 1dc into top of each dc; 1dc into the 1ch over each join;  repeat to end

NOTE:  Rows 1, 3 and 5 are worked on the right side of your work;  Rows 2 and 4 are worked on the wrong side of your work.


Join the 5th (bottom) row of the Popcorn Flower Squares  to the 5th (top) row of the Zooty Owl Squares using the VISIBLE JOIN

crochet baby blanket

Another photo hurriedly taken while precariously perched on a wall!  (Hubby fears finding me lying on the ground with a few broken bones!  - so I quickly take photos from my "perch" when he is not looking!)

For the final row make 8 Traditional Granny Squares.

granny square

I was going to do a little tutorial for the Granny Square, but I found a brilliant one over at LITTLE TIN BIRD 

Join your traditional granny squares using the Visible Join.

Crochet 5 Stripes onto the Bottom of the row of Traditional Granny Squares as follows:

Row 1:   Join your white yarn (or whatever colour you are using as your border colour) into the corner 3ch of the first square in the row;  
3ch in same place as join (counts as 1dc);   1dc into the top of each hdc, when you reach a corner on a block 1dc into corner, 1dc into loop of  join, 1dc into corner on next block.   Repeat this to the end of the row of blocks.  1dc into the last corner 3ch.

Row 2 - 5:   In the colour of your choice join yarn into first dc of previous row;  3ch (counts as first dc), 1dc into top of each dc; 1dc into the 1ch over each join;  repeat to end

NOTE:  Rows 1, 3 and 5 are worked on the right side of your work;  Rows 2 and 4 are worked on the wrong side of your work


Next week is the final instalment of this CAL - the border!!

Happy crocheting until then!

Wednesday 23 April 2014

Popcorn Flower Square: Baby Groovyghan CAL(7)

With all the holidays and the excitement about my STARFLOWER MANDALA PATTERN I almost forgot to write this post!

For those joining in now (or for those who are a little behind) here are the links to the previous posts:

WEEK 1 - RAINBOWS AND DAISIES SQUARES

WEEK 2 - RAINBOW HALF GRANNY SQUARES

WEEK 3 - THE FIRST STRIPES

WEEK 4 - CIRCLES IN SQUARES

WEEK 5 - ZOOTY OWL SQUARE

WEEK 6 - ITS STARTING TO LOOK A LOT LIKE A BABY GROOVYGHAN

After you have completed Week 6, your Baby Groovyghan should be looking something like this:


crochet baby blanket

Onto the top of the "Zooty Owl" row, crochet 5 stripes as follows:

Row 1:   Join your white yarn (or whatever colour you are using as your border colour) into the corner 3ch of the first square in the row; 1dc into the top of each dc, when you reach a corner on a block 1dc into corner, 1dc into loop of  join, 1dc into corner on next block.   Repeat this to the end of the row of blocks.  1dc into the last corner 3ch.
 
Rows 2 - 5:   "Granny Stripe"

Row 2:  Into space between first 2 double crochet on the wrong side of your work, crochet 3ch, 2dc,  *skip two spaces, into third space from hook 3dc* rep *to* to last 4dc, 3dc into space between last 2dc. 

Row 3:  turn work - now working on the right side;  ch 4;  *3dc into space between clusters* rep *to* to last sp between clusters, ch 1, 1dc into sp between last dc on final cluster of Row 2 

Row 4:   Working on the wrong side of your work;  3ch, 2dc into 1ch sp at end of prev row (i.e the start of this row);  *3dc into space between each cluster* rep *to* to last sp between clusters 

Row 5:  Repeat Row 3

Make 8 POPCORN FLOWER SQUARES and join together using the Visible Join


popcorn flower granny squares

Pattern Terms:  US 
Yarn:  Mirage 4ply 
Hook Size:  350mm 

Foundation:   4ch, sl st to join OR make a magic ring;

Row 1:  3 ch (counts as 1 dc):  11 dc into circle (12 dc), sl st into top of 3ch to join;

Row 2:  3ch (counts as 1dc), 1dc into top of  same dc;  [2dc into top of next dc (2dc group)] x11 = 24dc
 
Row 3:  Join yarn in any space between a 2dc group;   3ch (counts as 1dc), 4dc into same space as join; form popcorn, 2ch;  (popcorn stitch into space between next 2dc group, 2ch) x 11;   sl st into top of first popcorn to join


popcorn flower square

NOTE:   A Popcorn Stitch is formed by crocheting 5dc then removing the hook from the last loop, inserting the hook front to back on the first dc, and again into last loop, yoh and pull through


popcorn flower square


popcorn flower square


Row 4:  Join yarn in any 2ch space between popcorns;  6ch (counts as 1dc, 3ch), 2dc into same space as join;  (3hdc into each of next two 2ch spaces;  3dc, 3ch, 3dc into next 2ch space) x 3;  3hdc into each of next 2ch spaces;  2dc into same space as join, sl st into loop formed at start

Row 5:  [3ch (counts as 1dc) 2dc , 3ch, 3dc into same space as ss;  3dc into each of next 3 spaces between 3dc groups,  3dc, 3ch, 3dc into next space] x3;   3hdc into each of next 3 spaces between 3dc groups;   sl st into top of 3ch at start

Row 6:  3dc into space between each 3dc group;  into corner 3ch crochet 3dc, 3ch, 3dc - to end, sl st to close


This is what my Baby Groovyghan looks like so far:


crochet baby blanket

Next week we do the final stripes and blocks, and the week after (the final week) we will do the border.

The finished blanket if you are using 4ply and a 3.50 mm hook should be approximately  85cm x 110cm

Happy Hooking!!!

Friday 11 April 2014

Its starting to look a lot like a Baby Groovyghan CAL(6)

For those of you joining in now (or who may need to catch up) here is a little photo story of what we have done so far (I have included the links to the previous posts to make referencing easier for you):

WEEK 1 - RAINBOWS AND DAISIES SQUARES

I chose some shockingly bright colours in Mirage 4ply - and made some shockingly bright Rainbows and Daisies Squares


daisy granny squares

WEEK 2 - RAINBOW HALF GRANNY SQUARES

I made lovely (shockingly bright) Rainbow Half Granny Squares - and my baby groovyghan looked like this:


half granny squares

WEEK 3 - THE FIRST STRIPES

The Rainbow Daisy Square Row and the Half Granny Square row were joined with some shockingly bright stripes

granny squares

WEEK 4 - CIRCLES IN SQUARES

Here we had a bit of fun "designing" our own "Circles in Squares"


circle in square granny

WEEK 5 - ZOOTY OWL SQUARE

A little tutorial to make a Zooty Owl Square, and a twist on the "Circles in Squares" from Week 4.

We also crocheted 1 stripe onto the top of the row of Rainbow Half Grannies;  1 stripe onto the top and 1 stripe onto the bottom of the Circles in Squares Grannies

owl square

If you have a bit of catching up to do, don't feel too badly!   I have to admit that I also am a bit behind (embarrassed giggle) - I am working on so many exciting WIP's - there are just not enough days in the week!

STRIPES 

We have already worked 1 stripe onto the top of the row of Rainbow Half Grannies;  1 stripe onto the top and 1 stripe onto the bottom of the Circles in Squares Grannies

Crochet 5 Stripes onto the bottom of the Row of Circles in Squares Grannies:  AND
Crochet 5 Stripes onto the top of the Row of Rainbow Half Grannies:

Row 1 (already done in Week 5)
  
Rows 2 - 5:   "Granny Stripe"

Row 2:  Into space between first 2 double crochet on the wrong side of your work, crochet 3ch, 2dc,  *skip two spaces, into third space from hook 3dc* rep *to* to last 4dc, 3dc into space between last 2dc.


granny stripe
Row 2:  Into space between first 2 double crochet on the wrong side of your work, crochet 3ch, 2dc


granny stripe
Row 2:   *skip two spaces, into third space from hook 3dc

granny stripe
Row 2:  *skip two spaces, into third space from hook 3dc * rep *to* to last 4dc, 3dc into space between last 2dc.

Row 3:  turn work - now working on the right side;  ch 4;  *3dc into space between clusters* rep *to* to last sp between clusters, ch 1, 1dc into sp between last dc on final cluster of Row 2


granny stripe
Row 3:  turn work - now working on the right side;  ch 4;  *3dc into space between clusters*


granny stripe
Row 3:  rep *to* to last sp between clusters, ch 1, 1dc into sp between last dc on final cluster of Row 2

Row 4:   Working on the wrong side of your work;  3ch, 2dc into 1ch sp at end of prev row (i.e the start of this row);  *3dc into space between each cluster* rep *to* to last sp between clusters


granny stripe
Row 4:   Working on the wrong side of your work;  3ch, 2dc into 1ch sp at end of prev row


granny stripe
Row 4:   *3dc into space between each cluster* rep *to* to last sp between clusters

Row 5:  Repeat Row 3

Join the top of the bottom of the Row of Circles in Squares Grannies to the top of the Row of Rainbow Half Grannies using the VISIBLE JOIN

Crochet 5 Stripes onto the top of the Row of Circles in Squares Grannies:

Row 1 (already done in Week 5)

Row 2 - 5:   In the colour of your choice join yarn into first dc of previous row3ch (counts as first dc), 1dc into top of each dc;  repeat  to end 

Crochet 5 Stripes onto the bottom of the Row of Zooty Owls:

Row 1:   Join your yarn into the corner 3ch of the first square in the row; 1dc into the top of each hdc, when you reach a corner on a block 1dc into corner, 1dc into loop of  join, 1dc into corner on next block.   Repeat this to the end of the row of blocks.  1dc into the last corner 3ch.

Row 2 - 5:   In the colour of your choice join yarn into first dc of previous row;  3ch (counts as first dc), 1dc into top of each dc; 1dc into the 1ch over each join;  repeat to end

NOTE:  Rows 1, 3 and 5 are worked on the right side of your work;   Rows 2 and 4 are worked on the wrong side of your work.

Join the top of the bottom of the Row of  Zooty Owls to the top of the Row of Circles in Squares Grannies using the VISIBLE JOIN

This is where I have fallen slightly behind - I did mention that the Zooty Owls were quite a bit of work and so, alas, I have not completed my Zooty Owl row.    But this is what mine looks like so far:


baby groovyghan

There are a good few hours of crochet work involved to get up to this point, so I don't think I am going to load another row of squares onto this week!   I am still trying out a few ideas for the next row anyhow- not quite sure which one(s) to pick yet!

I have a fair bit of catching up to do - so that is what I shall be doing for the rest of the afternoon.

Hope you enjoy crocheting along with me!

If you do notice any errors please do not be shy to point them out - always a bit difficult to proof one's own work!

Wednesday 19 March 2014

The First Stripes: Baby Groovyghan CAL (3)

At this stage of the CAL we have two rows of squares.   One row of 8 x  RAINBOWS AND DAISIES SQUARES;  and one row of  8 x RAINBOW HALF GRANNIES SQUARES

We are going to be working "bottom" to "top", your "bottom" row being your Rainbows and Daisies Squares.


granny squares

If you are a seasoned crocheter you will not have any trouble joining the completed striped rows to the next row of squares in an even manner.    I do find, however, that the more inexperienced crocheters struggle to get an even finish here - so I am going to teach you a little "trick".

We are going to crochet 10 rows of stripes - 5 onto the top of the row of Rainbow Daisies and 5 onto the bottom of the row of Rainbow Half Grannies - and then we will join stripe to stripe!

Crochet 5 Stripes onto the top of the row of Rainbows and Daisies as follows:

Row 1:   Join your white yarn (or whatever colour you are using as your border colour) into the corner 3ch of the first square in the row; 1dc into the top of each dc, when you reach a corner on a block 1dc into corner, 1dc into loop of  join, 1dc into corner on next block.   Repeat this to the end of the row of blocks.  1dc into the last corner 3ch.

Row 2 - 5:   In the colour of your choice join yarn into first dc of previous row3ch (counts as first dc), 1dc into top of each dc;  repeat  to end 

Crochet 5 Stripes onto the bottom of the row of Rainbow Half Grannies as follows:

Row 1:   Join your white yarn (or whatever colour you are using as your border colour) into the corner 3ch of the first square in the row; 1dc into the top of each hdc, when you reach a corner on a block 1dc into corner, 1dc into loop of  join, 1dc into corner on next block.   Repeat this to the end of the row of blocks.  1dc into the last corner 3ch.

Row 2 - 5:   In the colour of your choice join yarn into first dc of previous row;  3ch (counts as first dc), 1dc into top of each dc; 1dc into the 1ch over each join;  repeat to end

NOTE:  Rows 1, 3 and 5 are worked on the right side of your work;   Rows 2 and 4 are worked on the wrong side of your work.


groovyghan

Your two sections should now look like this (ignore the bottom part of the Rainbows and Daisies Section - I am working ahead there).   The rows are quite straight but the photo was taken on an uneven surface.

Now work the two sections together using the VISIBLE JOIN


groovyghan

Your Baby Groovyghan is now starting to take shape - with a lovely even stripe between your rows of squares:


groovyghan

I need to go and contemplate the next square (something easy but interesting)....... Part 4 will be posted by next week Wednesday!

Happy hooking until then!

Sunday 10 November 2013

Rainbow Candy Diagonal Granny Stripe

I had been planning to make my niece a "groovyghan" for Christmas.    Luckily I remembered that eleven year olds are VERY particular little people, and decided that I should rather discuss the project with her before plunging in.

A good thing too!

She wanted stripes - no blocks.   Very particular stripes in fact - "they must not be fat, also not dizzy stripes" (thin stripes).   No frills or flowers.  I had also planned to make it for her bed - she wanted a square blanket to snuggle under while watching DVD's.  Alrighty then! - as I said - good thing I asked!

We added a couple of colours to those I had already selected and I got started on the project HERE early in October. 


granny stripe

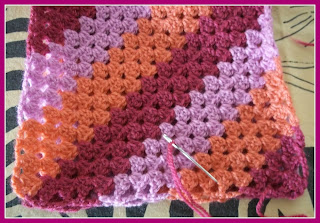
I used the Diagonal Granny Stripe - a firm favourite of mine.    You can find a how to in my Diagonal Granny Stripe Infinity Scarf post

This Diagonal Granny Stripe had to be square - this means to you keep on increasing on both sides until the outer edges of the triangle measure the length and width you wish your finished project to be.   Then decrease on both sides until your last cluster.


granny stripe

I used candy pink, fuschia, peach, red, lemon, lime, mint, jade, aqua, turquoise, blue, denim, lilac and purple for my colour stripes:


granny stripe

On the increase half I used white to separate the colour bands.   A few rows before I started decreasing I introduced grey between the colour bands.     


granny stripe

Once I started decreasing I began using grey as the separator colour and phased out the white over the first few rows.  

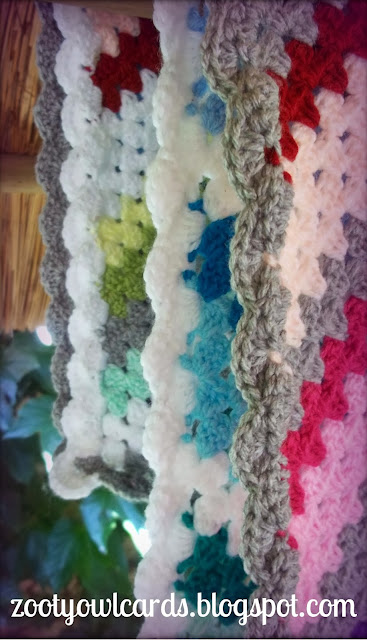
For the border I did a double row of shells:


granny stripe

I crocheted a two tone border - white on the white diagonal (2 sides) and grey on the grey diagonal (2 sides):


granny stripe

We had fantastic weather on Friday.     Hot as ...., but beautiful clear blue skies.    Perfect weather for a  bit of photo fun.  

Bundled the blankie onto one of our shaded walkways:


granny stripe

 Posed it on the stairs leading up to my rose garden:


granny stripe

Rolled up under the Lapa's thatch:


granny stripe

Hanging it from the beams:


granny stripe

Folding it in different ways:


granny stripe

Posing it here and there:


granny stripe

By then I was rather hot and bothered.    Took a lovely swim and poured myself some homemade ginger beer with lots of ice and lemon slices.   Sat myself down poolside to contemplate my Christmas List (one down - way to many to go!!)

Didn't get much done yesterday - "meltingly" hot again = hanging out with hubby and my youngest (who turned 21 recently!!!) - swimming, sipping iced tea and ginger beer, nibbling on finger food, and watching movies in the lovely cool family room (until four in the morning!).     Such a relaxing, perfect day!

Going to make brunch in a few minutes and after that I suppose I should go back to contemplating that Christmas List!

Friday 23 August 2013

Infinity Scarf - Diagonal Granny Stripe

I used to love long floaty winter scarves (even better if they had super long full tassles)!   Only problem with this type of scarf is the possibility of serious bodily injury - as they always seem to get caught on and in everything.

My new winter favourite is the Infinity Scarf (lovely and warm, fairly loose around the neck and so out of the way!   

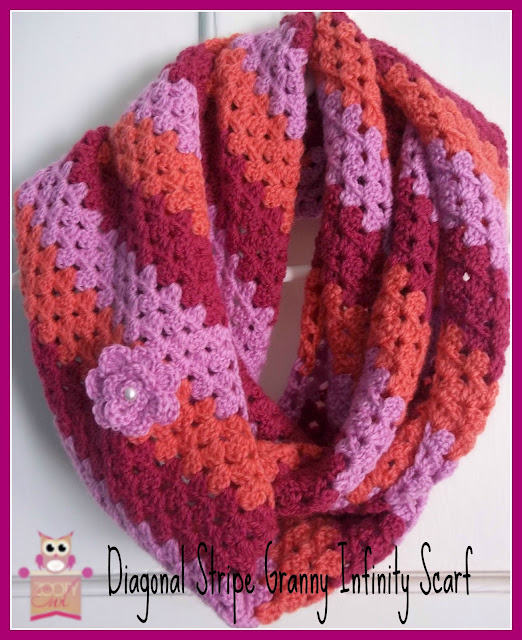
The Diagonal Granny Stripe is also a big favourite of mine - I just HAD to use it to make an infinity scarf:


Diagonal Stripe Infinity Scarf

Here is my pattern in case you would like to make one (I have tried to make it as accurate as possible - I am only human though - so please leave me a comment if you find an error)!

Start with:  5ch
Row 1:  Into 5th ch from hook - 3dc, 1ch, 1dc (first corner formed)

Begin Increasing:
Row 2:  4ch -  turn; 3dc into 1ch sp; 3dc, 1ch, 1dc into corner space


Diagonal Stripe Infinity Scarf

Row 3:  4ch - turn;   3dc into 1ch sp, 3dc into space between clusters; 3dc, 1ch, 1dc into corner space


Diagonal Stripe Infinity Scarf

Repeat Row 3 13 times (16 rows in total)

In order to form a long rectangular strip you will now continue to increase on the one side of your work, while decreasing on the other:

Row 17:  4ch turn; 3dc into next sp between clusters (decrease = 2nd corner formed), 3dc into each subsequent sp, into last sp on row work 3dc, 1ch, 1dc (increase)


Diagonal Stripe Infinity Scarf

Row 18:  4ch  turn; 3dc into 1ch sp (increase); 3dc into each subsequent sp up to 2nd last sp; 1ch, 1dc into last sp

Repeat rows 17 and 18 until you have a total of 130 rows

At this point you will continue to decrease on the one side as you have been doing and you will begin decreasing on the side where you were previously increasing:

Row 131:   4ch turn; 3dc into next sp between clusters (decrease), 3dc into each subsequent sp up to 2nd last sp; 1ch, 1dc into last sp (decrease - 3rd corner formed)

Repeat until second last row = 1sp, 1 cluster, 1 sp

Final Row:  4ch turn 1dc into sp at end of row.

Fasten off

Fold in half and join the bottom and top seams:


Diagonal Stripe Infinity Scarf

I gathered my seam slightly (I find it sits better at the back of the neck) - but this is up to you.

Yarn used:    Stylecraft Life - Fuschia, Melon, Clover (four rows of each in that order)

Hook used:   5.00mm (my tension is a bit on the tight side though).

Fun to make - lovely to wear!